The impact of water damage can be severe if not addressed promptly and properly. It isn’t just about improving the appearance; it’s also about preserving the structural strength of your home. This article will guide you step-by-step through the process, from identifying the extent of damage to completing the restoration of your floor.
- Knowing The Extent Of Damage
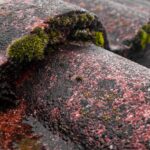
The first and most crucial step in managing a water-damaged floor is to grasp the extent of the damage. It’s not always as straightforward as it might seem. You might see some discoloration or warping on the surface, but hidden damage could run deep below.
Here’s where a Water Damage Specialist can be a game-changer. Their expertise allows them to identify hidden issues, like moisture trapped beneath the floorboards or potential mold growth, which can cause further damage if not addressed.
You can start assessing the damage yourself by looking for signs such as buckling, sagging, or discoloration on your floors. Different types of flooring, whether hardwood, laminate, or carpet, will exhibit different signs of water damage, so it’s crucial to be familiar with these indicators.
- Safety Measures
Before you roll up your sleeves and dive into the cleanup, it’s essential to take some safety precautions. Water damage situations can pose certain risks, including electrical hazards and potential exposure to contaminants.
Ensure you’re equipped with the necessary personal protective equipment, including waterproof gloves, safety goggles, and even a mask if there’s a potential mold issue. If the damage is extensive, it might be wise to switch off the electricity in the affected area to avoid any potential electrical hazards.
- Removing The Water
The next phase is to remove any standing water from the area. The quicker you can do this, the better, as it minimizes the potential for further damage and mold growth. Tools like wet vacuums or portable pumps can assist with this task. Remember, the goal is not just to remove visible water but also to start drying out the area as soon as possible.
Using fans, heaters, and dehumidifiers can help speed up the drying process. However, it’s important to keep in mind that this step can take a while, especially if the water has seeped into your subflooring. Patience is key here—the more thorough you are in drying your floors, the better the foundation for your repairs.
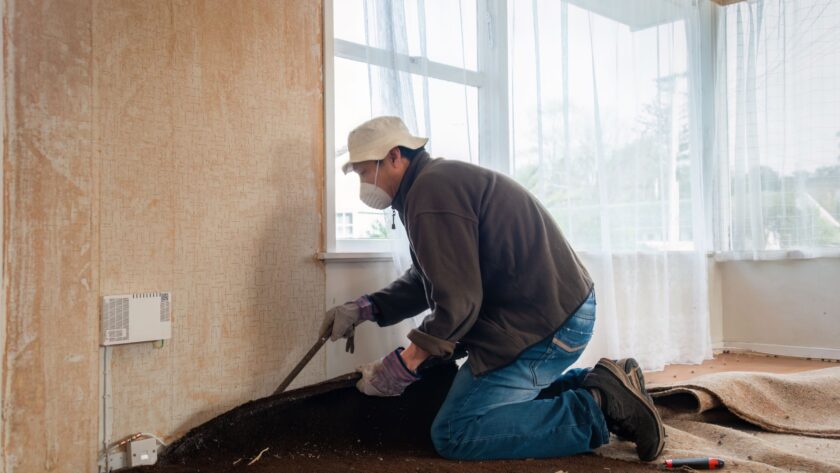
- Assessing And Removing Damaged Floor Material
After the water removal and drying process, it’s time to evaluate the affected flooring material. Depending on your floor type, this can involve different approaches.
For carpet, look for discoloration, a musty smell, or dampness that persists even after drying. If these signs are present, it may be necessary to to contact professional water damage restoration services or consider replacing the carpet if the damage is too severe. Hardwood and laminate floors may show signs of warping or buckling and may also need replacement if the damage is severe.
In any case, removal should be done with care to avoid causing more damage. If you’re unsure about this process, don’t hesitate to call a professional to ensure a job well done.
- Preparing For Repair
Before moving on to the repair phase, you need to ensure the area is thoroughly clean and dry. This includes the subfloor, which could harbor hidden moisture. Use a moisture meter to confirm the area is completely dry.
Next, clean the area thoroughly to remove any dirt or debris. If there was any potential for sewage contamination during the flooding, use a disinfectant to ensure the area is safe for repair.
Remember, mold is a significant concern with water damage, so keep an eye out for any signs of growth. If you suspect mold, it’s essential to treat the area with a mold-killing product before proceeding.
- Repairing The Floor

Now that your floor is clean, dry, and ready, it’s time to install the new flooring material. The specifics will depend on your floor type. For carpet, it’s a matter of laying down new padding and carpet; for hardwood, you may be replacing individual boards or larger sections.
Keep in mind that matching new flooring to existing areas can be a challenge, especially with materials like hardwood. You may want to consult with a flooring expert to ensure the best possible match.
During this process, take your time and pay attention to details. The aim is not just to cover up the damage but to restore your floor to its original state.
- Preventive Measures For Future
Once you’ve successfully repaired your water-damaged floor, you’ll want to take steps to prevent such an incident from happening again. Water damage is often the result of leaks, heavy rainfall, or flooding, but it can also be due to everyday occurrences like spills or high humidity.
Regular inspections of areas prone to water damage—like bathrooms, kitchens, and basements—are a good starting point. Look for signs of leaks and address them promptly. If your residence is situated in an area susceptible to flooding, you might want to think about allocating funds for flood barriers or other similar protective measures.
You should also maintain a moderate level of humidity in your home. Dehumidifiers can help in areas with naturally high humidity. Simple practices, like promptly cleaning up spills and not overwatering indoor plants, can also go a long way in preventing water damage.
Conclusion
It’s essential to prioritize safety and consider seeking professional help when needed. And once you’ve navigated through the repair process, taking preventive measures will help safeguard your home against future water damage.
By following this guide, you’ll not only restore the beauty and function of your floors but also enhance the overall resilience of your home.